Fixing Unwanted Holes
In this March 2011 project I am removing five unwanted holes where thru hulls used to be.
I am eliminating the sink drains in favor of a Gray Water system that discharges out the Black Water outlet. (I was informed by Peggie on the sailboat owners forum, that this was going to cause me problems with the Coast Guard. So, I am currently rethinking this idea). I will be using the existing manual pump located in the starboard lazarette that was for the original Black Water system.I am also eliminating the two sensor holes in favor of one “Correctly” located one (forward and more center then they were)
I am also eliminating the current Raw Water hole in order to locate the valve in a more accessible location.
- Galley sink outlet 1-1/2″
- Raw water intake 3/4″
- Depth sounder 1-1/2″
- Speed sensor 1-1/2″
- Head sink 1″
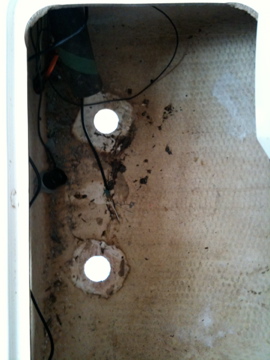 This image shows the holes in the port side salon seat after the galley sink thru hull and original depth transponder were removed.The transponder was plastic and easy to remove by simply removing the nut and knocking it out with my hammer.
The sink drain thru hull took a saws-all and a hammer to remove because the gate valve was frozen to the thru hull and even after soaking it with PB Blaster overnight it would not budge! There were 1/2″ plywood backing plates on all the thru hull locations, all were soft and easily removed. This backing plate made it easy to cut 2 slits into the thru hull fitting and nut. I was then able to use my hammer and pliers to bend and twist the assembly out.
Both of these holes are now filled on and solid, details to follow. I plan to put a 25 gal water tank in this location
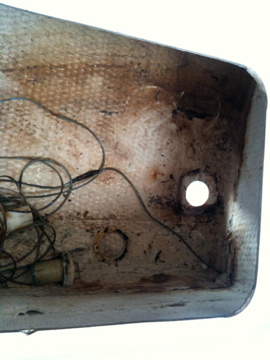 This image shows the hole where the old speed transponder was under the starboard side salon seat. This was also a plastic thru hull with a plywood backing plate. This hole is also now filled in to allow placement of a 25 gal water tank.
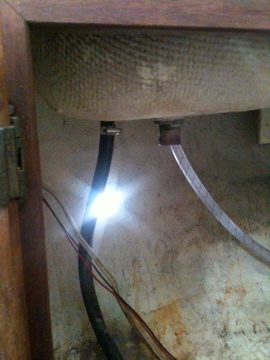 This is the head sink thru hull. I was actually an above water thru hull but I decided to fill in this hole also and install a “Gray Water” tank for this location also. Details in the “Gray Water Tanks” project page.The last thru hull was the raw water inlet located in the engine compartment (I seem to have lost that image). I also filled in that hole and relocated it in a more accessible spot.
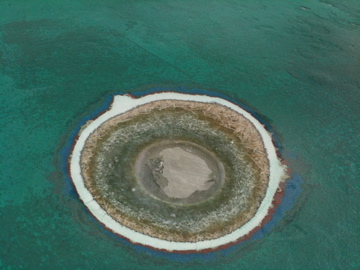
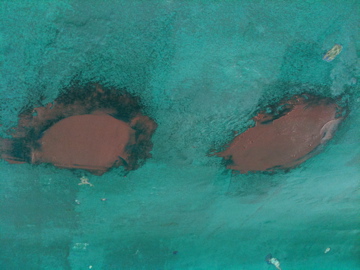
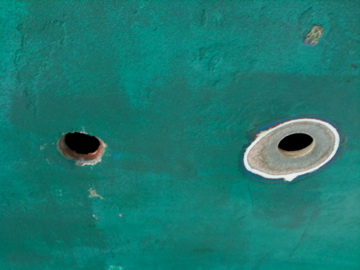 This image shows the two port side holes from the outside. The left is before prep and the right is after prep.Using a side grinder with a 160 grit sanding wheel, I ground down the surface around the hole to allow the addition of fiberglass woven and mat to be applied. You can see the hulls layers, gel-coat – mat – woven. The hull thickness here is about 1/2″.
The prepped hole is the old galley sink hole and the other is the old depth transponder hole.
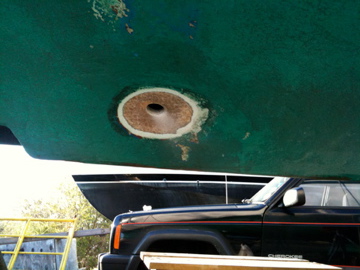 This image shows the original raw water thru hull location, prepped for filling in.
The process I used to remove the existing unused holes is this.First I created a solid resin “Puck” using West System epoxy and a plastic cup with a bottom slightly larger then the hole I was filling. Pour the resin into the cup to a depth slightly more then the thickness of the hull that was left after prepping the hole. When the epoxy is hard and set, remove it from the cup. Using a Dremel with a #504 1-1/8 x 3/16 80 grit flap wheel carefully grind down the puck to snugly fit in the hole. Then use epoxy to adhere it in place. You can use Duct Tape on the outside to keep the liquid epoxy from just draining out. I also went inside and poured a good layer around the diameter of the puck to soak into the gaps. Let set overnight. The next day I removed the Duct Tape and with my side grinder and removed the excess and scuffed up the site for the woven layer. (inside and out)
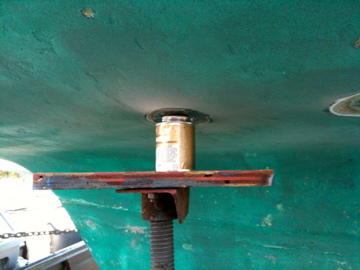 I had one puck that I made just a tad too small so I had to use a dry dock stand and a can to help hold the puck in place. Gravity is sometimes not a friend.Notes:
I found it very handy to have a good supply of cups, Popsicle sticks, white vinegar, rags, cheep 1″ brushes, latex gloves and a plastic tray.I used West System epoxy and hardener with 403 bonding filler and 405 filleting filler. 6oz woven fiberglass cloth and fiberglass mat cloth.
 Now the woven layers are applied, inside and out. I put in 4 layers, each layer a little larger in diameter then the previous one. Allow time for the epoxy to “Kick off” before adding the next layer. I did two layers and then allowed it to dry overnight before adding the next two. I also used my side grinder with 220 grit paper to “LIGHTLY” skuff and even out the surface between layers 2 and 3. After layers 3 and 4 were allowed to dry overnight, I again “LIGHTLY” skuffed the surface to prepare for the mat layers.I used the 1″ brushes to apply a thin layer of epoxy to the surface and applied the woven and mat layers to the wet epoxy. Then I carefully added epoxy to the dry side of the woven / mat layer and worked out the bubbles with an epoxy resin roller.
 The final 1 or 2 layers applied are the Filler layers. This is very much like Bondo or Drywall spackle. You mix up a batch of epoxy and add the “Filleting” fibers until you get a stiff consistnecy. It is applied using a plastic squeegie much like what you would use to apply spackle on drywall. You want to end up with a nice smooth layer that is even with the existing hull. It is easy to sand so if your a layer is a little too thick it is sanded down to the proper level when dry.Once finished I applied a thin layer of epoxy with my 1″ paint prush. This very last layer of epoxy fills in any tiny holes and helps the paint stick. Once the last layer is dry VERY VERY lightly scuff the area and paint with bottom paint.
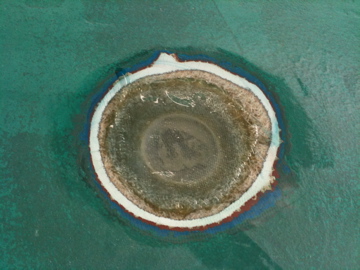
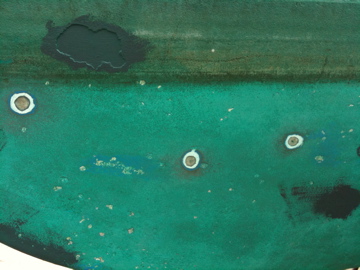 I used the same steps (except the Puck) to repare these 3 blisters that showed up on the port bow just under the water line.